In This Article:
Configure the Display Style of the Delivery Calendar
The Display style of the delivery calendar can be configured individually or globally. To configure the display style of the delivery calendar follows these steps:
Configure from Display Settings
Go to Products → Plan Delivery → Display Settings
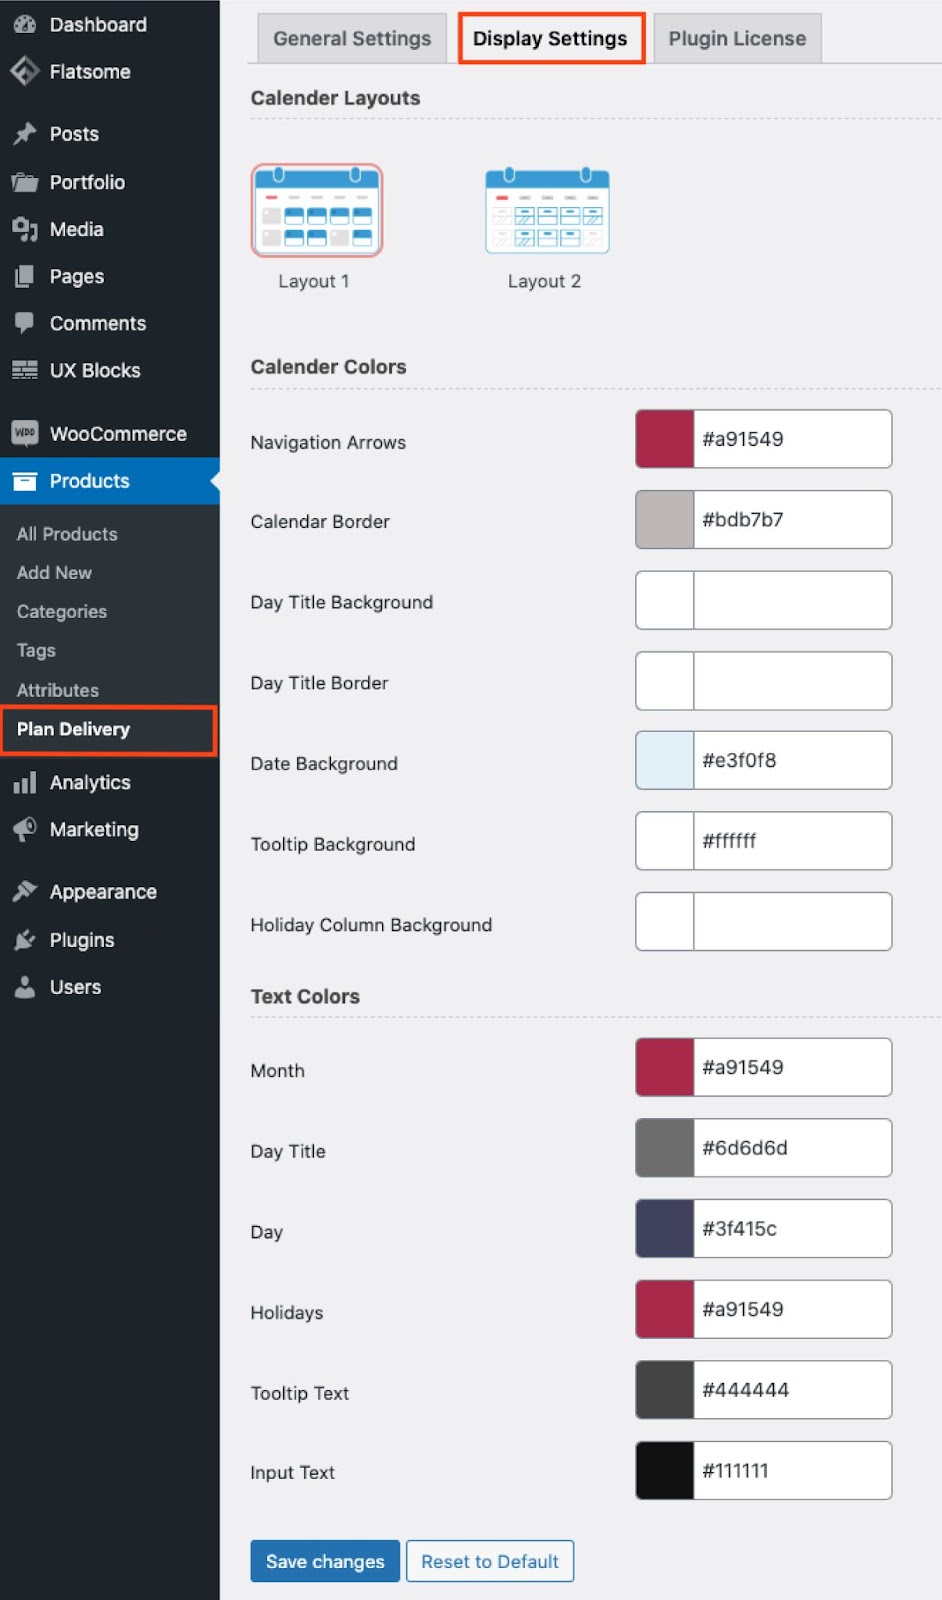
- Calender Layouts
Choose any preferable calendar layout from the two layout options. - Calender Colors
-
- Navigation Arrows: Define the navigation arrow color for the delivery calendar.
- Calendar Border: Define the border color for the delivery calendar.
- Day Title Background: Define the background color for the day titles on the delivery calendar.
- Day Title Border: Define the border color for the day titles on the delivery calendar.
- Date Background: Define the date backgroung color for the dates on the delivery calendar.
- Tooltip Background: Define the background color for the hover tooltip on the delivery calendar.
- Holiday Column Background: Define the background color for the holiday columns.
- Text Colors
- Month: Define the month text color of the delivery calendar.
- Day Title: Define the day title text color of the delivery calendar.
- Day: Define the day text color of the delivery calendar.
- Holidays: Define the holiday text color of the delivery calendar.
- Tooltip Text: Define the text color for the tooltip text of the delivery calendar.
- Input Text: Define the input text color of the delivery calendar.
Click on the “Save Changes” button to confirm the changes.
Configure from Individual Settings

- Go to Products → All Products → Edit from a Simple Product.
- Enable the checkbox Plan Delivery.
- Navigate to the Plan Delivery menu under the Product Data tab. Untick the checkbox ‘Use Global Settings’.
- Select the Display Settings section. Fill in the following data:
- Calendar Colors
- Primary Color
- Secondary Color
- Holiday Columns
- Tooltip BG
- Text Colors
- General
- Input Value
- Tooltip
- Click on the “Save Changes” button to confirm the changes.
Comments
0 comments
Please sign in to leave a comment.