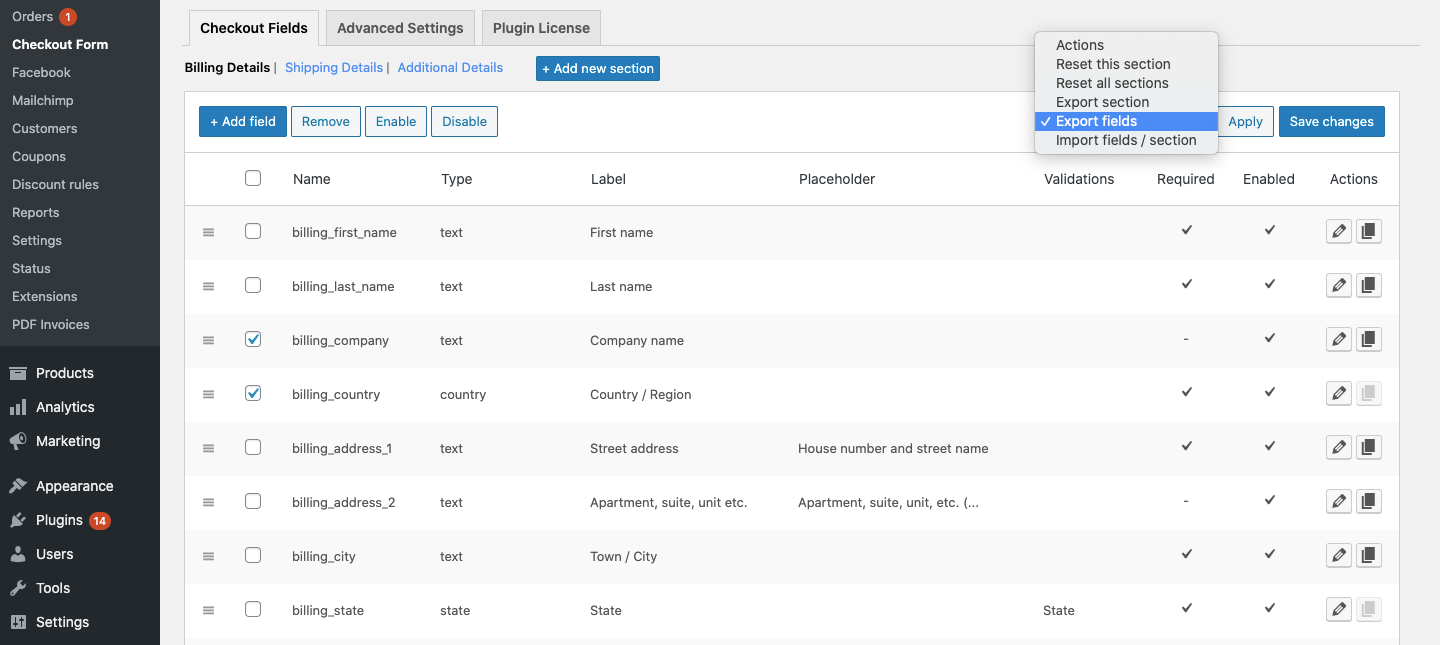
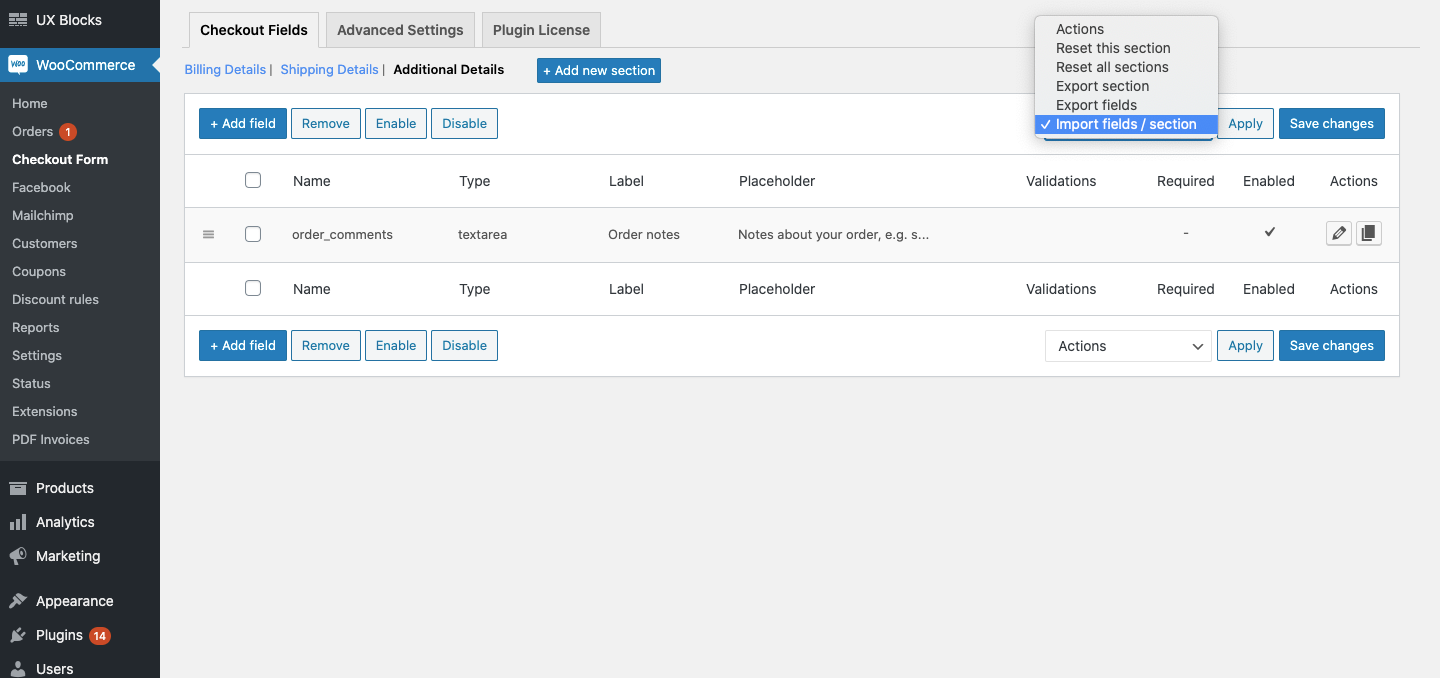
The export and import feature of the plugin lets you quickly export the checkout fields from one section to another section of your checkout page. Also, you can import a particular section and the fields inside them to the checkout page of another website.
Steps to follow while importing and exporting checkout fields and sections are discussed below.
Export section
Using the Export section feature of the plugin, you can export both the default and custom sections of your checkout page.
To export a section,
-
Navigate to Checkout Form > Checkout Fields.
-
Select the section you need to export.
-
When the section is chosen, click on the Action drop-down below the section name.
-
Select the Export section from the dropdown and click on the Apply button.

-
You will receive a ‘Section exported successfully’ message in your dashboard, when it gets exported. You can download the exported file from the media library or get it from the link attached with the message.
Export fields
With the Export fields feature of the plugin, you can export both the default and custom fields of your checkout page.
To export a field,
-
Navigate to Checkout Form > Checkout Fields.
-
Select the field(s) you need to export and click on the Action drop-down.

-
Select the Export fields from the dropdown and click on the Apply button.
-
Once the field gets exported, you will receive a ‘Field(s) exported successfully’ message in your dashboard.
-
Download the exported file from the media library or get it from the link attached with the message.
Import fields / section
To import fields/section,
-
Navigate to Checkout Form > Checkout Fields.
-
To import a section, click on the Actions drop-down below the section name. Select the Import fields/section from the drop-down and click on the Apply button.
-
To import field(s), go to the desired section where you want to import the respective field. Click on the Actions drop-down and select Import fields/section from the dropdown. Click on the Apply button.

-
Once the Apply button is clicked, a popup appears. Read the points displayed on the popup and click on the Choose file button to import the file.
-
After choosing the file to be uploaded, click on the Import Now button.
-
The field/section will be successfully imported. You will receive a successfully imported message in your dashboard.
Note:
-
If you are importing a section with the same name as the existing section, the existing section will be replaced with the section & fields in the imported file.
-
If the imported section does not exist, the section & fields in the imported file will be added with the existing sections.
-
If you are importing field(s) with the same name in the current section, existing fields will be replaced with fields in the imported file.
-
If the imported fields do not exist in the current section, the fields in the imported file will be added with existing fields.
-
Also, importing default checkout fields into multiple sections may create some unexpected errors.
-
Comments
0 comments
Please sign in to leave a comment.