This article explains the steps to add a Date Picker in the WooCommerce Checkout page by correctly configuring WooCommerce Checkout Field Editor plugin. Using this plugin you can customize WooCommerce checkout fields.
Add New Date Picker Field
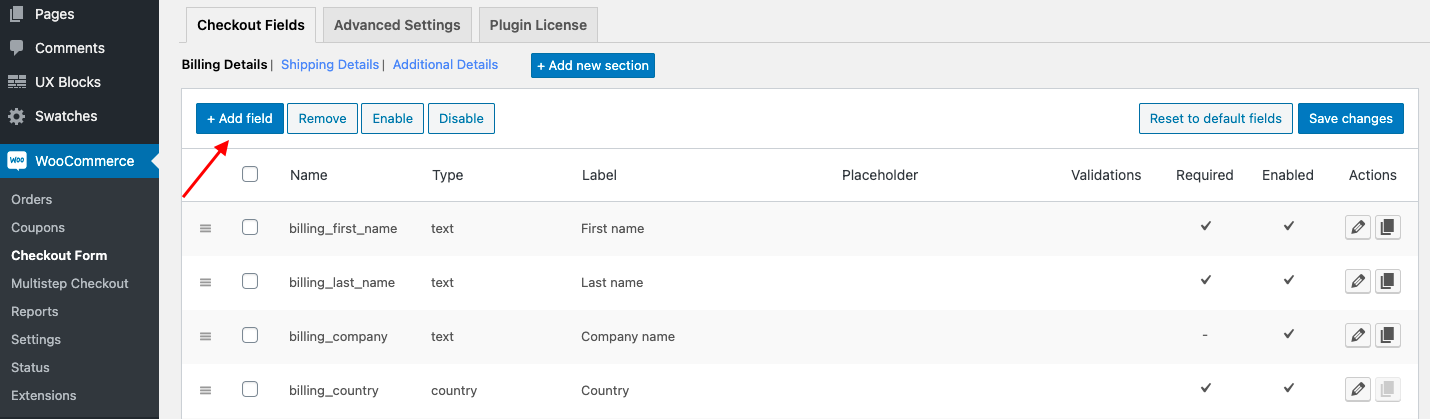
To add a new Date Picker field, first go to one of the sections (Billing, Shipping, Additional) where you want to add the field, and then click the ‘Add Field’ button.
It will open a popup form where you need to select Date Picker from the Field Type select box. Fill the name for the field and other properties in the form and click on the ‘Add New Field’ button. Finally, click on the ‘Save Changes’ button so that the new changes take effect.
Properties specific to the field type Datepicker
| Date Format | Define the date format accepted for this field. The default format is dd/mm/yy. You can edit this format and rewrite it according to your requirements. These are the other general time formats you can use:
|
| Default Date | Set default date to be displayed. Specify the date in the format specified in the Date Format property. You may also specify the number of days to be offset from today (e.g. +7) or a string of values and periods ('y' for years, 'm' for months, 'w' for weeks, 'd' for days, e.g. '+1m +7d'), or leave empty if you don’t want to set a minimum limit. |
| Min. Date | The date picker calendar will only show dates starting from the date set in this field. Specify the date in the format yyyy-mm-dd. You may also specify the number of days to be offset from today (e.g. -7) or a string of values and periods ('y' for years, 'm' for months, 'w' for weeks, 'd' for days, e.g. '-1m -7d'), or leave empty for today. |
| Max. Date | The calendar will only show dates up to the date set in this field. Specify the date in the format yyyy-mm-dd. You may also specify the number of days from today (e.g. +7) or a string of values and periods ('y' for years, 'm' for months, 'w' for weeks, 'd' for days, e.g. '+1m +7d'), or leave empty if you don’t want to set a maximum limit. |
| Year Range | This defines the range of years displayed in the year drop-down of the date picker calendar. The format is “from year: to year”. You can set the range in different ways as explained below:
|
| Number Of Months | The number of months to show at once on the date picker calendar. |
| Disabled Days | Select the days of the week that need to be disabled on the calendar. For example, you may want to disable Saturdays and Sundays on the calendar. |
| Disabled Dates | Enter dates that need to be disabled on the calendar in yyyy-mm-dd format separated by commas for multiple dates. This is useful if you want to disable specific days such as holidays. Ensure the dates are provided in the correct format. If you want to disable 17th January 2017 and 23rd March 2017 in the date picker you can fill this field with the value 2017-01-17,2017-03-23. |
How To Disable Specific Days In Date-Picker
You can disable specific days from the calendar using the Disabled Days option in the field settings form. Choose the days that need to be disabled on the calendar from the Disabled Days multi-select drop-down. This is useful if you want to disable specific days such as Saturdays and Sundays. For example, if you want to disable Saturdays and Sundays in the date picker you can choose these days from the drop-down options.
Refer to the above video.
How To Disable Specific Dates In Date-Picker
You can disable specific dates from the calendar using the "Disabled Dates" option in the field settings form. Enter dates that need to be disabled on the calendar in yyyy-mm-dd format separated by commas for multiple dates. This is useful if you want to disable specific days such as holidays. Ensure the dates are provided in the correct format. For example, if you want to disable 3rd March 2017(Mother's Day) and 25th December 2017(Christmas Day) in the date picker you can fill this field with the value 2017-03-03,2017-12-25.
Refer to the above video.
Comments
0 comments
Please sign in to leave a comment.